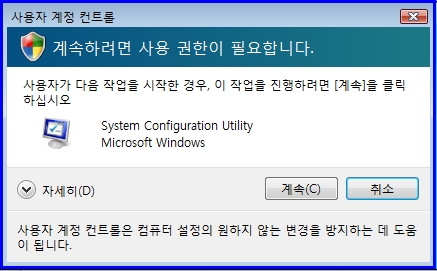
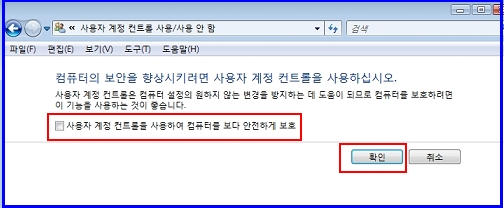
비스타를 사용하면서
관리자인데, 각종 권한을 확인하면서 갑자기 화면 변환으로 깜짝 깜짝 놀랐다.
이것을 해결하기 위해서 검색했다..
----------------------------------------------------------------------------------------------


비스타를 사용하면서
관리자인데, 각종 권한을 확인하면서 갑자기 화면 변환으로 깜짝 깜짝 놀랐다.
이것을 해결하기 위해서 검색했다..
----------------------------------------------------------------------------------------------


출처 : http://blog.byeoli.com/category/%EB%AA%A8%EB%B0%94%EC%9D%BC
ActiveSync 4.x 이상의 버전에서는 3.x 버전과와 달리 싱크 프로그램에서 자체 원격 연결을 지원하지 않습니다. 이 때문에 일반적으로 모바일 장치의 프로그램을 개발하기 위해선 어쩔 수 없이 ActiveSync의 도움을 받아서 사용해야 했습니다.
다음은 Visual Studio 2005 개발 환경에서 ActiveSync를 사용하지 않고 직접 모바일 장치와 원격으로 연결하는 방법입니다.
테스트 환경
- Windows XP Pro SP2
- Visual Studio 2005
- Windows Mobile 5 Smart Phone SDK
- 모바일 장치의 네트워크 주소는 인터넷 공유기의 가상 IP 환경(192.168.x.x)
- 블랙잭(M620, WM5 SP)의 무선랜 연결, 락(Security Lock) 해제 상태.
액티브 싱크 없이 CE 5.0 장치를 디버깅
Step 1. 다음의 파일들을 직접 아래의 경로에서 모바일 장치로 복사해 옵니다.
X:\Program Files\Common Files\Microsoft Shared\CoreCon\1.0\Target\wce400\(해당하는 CPU 선택)
(모바일 장치에서의 실행 경로는 테스트 해 본 결과 임의의 폴더로 지정해도 무방했습니다.)
- ClientShutdown.exe
- ConmanClient2.exe
- CMAccept.exe
- eDbgTL.dll
- TcpConnectionA.dll
(위의 파일들이 기존의 ActiveSync를 사용한 디버깅 과정에서, 이미 장치의 Windows 폴더 등에 다운로드 되어 있다면 그 파일들을 사용해도 됩니다.)
Step 2. 모바일 장치에서 ConmanClient2.exe 를 직접 실행합니다.
Step 3. Visual Studio 2005에서 IP 관련 정보를 설정해 줍니다.
VS 2005 에서 '도구 - 옵션 - 장치 도구 - 장치' 에서 자신이 원하는 장치를 선택합니다.
속성 버튼을 누른 후 전송 탭에서 'TCP Connect 전송' 을 선택한 후 구성을 클릭합니다.
장치 IP 주소에서 '특정 IP 주소를 사용' 선택한 후에 장치의 IP 주소를 입력합니다.
Step 4. 모바일 장치에서 CMAccept.exe 파일을 직접 실행합니다.
VS 2005에서 장치 연결을 시도합니다. (이 때 3분이내에 장치와의 연결이 완료되어야합니다. 만약 연결되지 않을 경우 CMAccpet.exe 파일을 다시 실행해 주세요.
Step 5. 기존의 작업환경과 동일하게 디버깅을 할 수 있습니다.
*** 2번으로 했을때, 바로 크래들로 연결이 안됨.
그래서 먼저 실행 후 크래들로 연결 이 가능함.
그후 인터넷 연결 시 성공!!
기본적으로 제공되는 것은 영문 Emulator 이미지를 제공한다.
그래서 언어에 맞는 이미지를 다운받아 사용한다.
한글 Mobile 5 Pocket PC 이미지
한글 Moblie 5 Smart Phone 이미지
| Jayan Nair (view profile) August 31, 2004 |
Environment: C#, Windows
The objective of this article is to demonstrate a socket-based client/server application that will allow two-way asynchronous communication between a server and multiple client applications. Because this example uses asynchronous methods, the server application does not use threads to communicate to multiple clients (although internally the asynchronous communication mechanism uses threads at the OS level).Objective
The key difference between synchronous and asynchronous communication can be explained with an example.
Consider a server application that is listening on a specific port to get data from clients. In synchronous receiving, while the server is waiting to receive data from a client, if the stream is empty then the main thread will block until the request for data is satisfied. Hence, the server cannot do anything else until it receives data from the client. If another client attempts to connect to the server at that time, the server cannot process that request because it is blocked on the first client. This behavior is not acceptable for a real-world application where we need to support multiple clients at the same time.
In asynchronous communication, while the server is listening or receiving data from a client, it can still process connection requests from other clients as well as receive data from those clients. When a server is receiving asynchronously, a separate thread (at the OS level) listens on the socket and will invoke a callback function (specified when the asynchronous listening was commenced) when a socket event occurs. This callback function in turn will respond and process that socket event. For example, if the remote program writes some data to the socket, a "read data event" (callback function we specify) is invoked which knows how to read the data from the socket at that point.
Even though this could be achieved by running multiple threads, the C# and .NET frameworks provide us with a rich set of functionalities to do asynchronous communications without introducing the complexity of threading.
The Socket class (System.Net.Sockets.Socket) provides a set of synchronous and asynchronous methods for synchronous or asynchronous communication. As per the .NET naming convention, all the asynchronous method names are created by prefixing the words "Begin" or "End" to the name of the synchronous methods. The methods prefixed with "Begin" and "End" represent a pair of asynchronous methods corresponding to a single synchronous method, as shown in the following table.
| Synchronous Methods | Asynchronous Methods |
Connect() |
BeginConnect() |
Receive() |
BeginReceive() |
The example shown in this article has two classes, one implementing the Socket Server and the other implementing the Socket Client.
The Socket Server application is implemented in the SocketServer class (file name SocketServer.cs). This class has a main Socket object (m_mainSocket) and an array of worker Socket objects (m_workerSocket) as members. The main Socket object does the listening for the clients. Once a client is connected, the main Socket transfers the responsibility to process the transactions related to that particular client to a worker Socket. Then, the main Socket goes back and continues listening for other clients.
BeginAccept() and BeginReceive() are the two important methods in the Socket class used by the Socket Server application.
The BeginAccept() method has the following signature:
public IAsyncResult BeginAccept( AsyncCallback callback, // (1) Function to call when a client // is connected object state // (2) State object to preserve socket // info );
Essentially, after calling the Listen() method of the main Socket object, we call this asynchronous method and specify a call back function (1), which we designated to do the further processing related to the client connection. The state object (2) can be null in this particular instance.
Because this is an asynchronous method, it will return immediately and the server main thread is free to process other events. Behind the scenes, a separate thread will start listening on that particular socket for client connections. When a client requests a connection, the callback function we specified will be invoked.
Inside the callback function (in our example, the function is named "OnClientConnect()"), we will do further processing related to the client connection.
public void OnClientConnect(IAsyncResult asyn) { try { // Here we complete/end the BeginAccept() asynchronous call // by calling EndAccept() - which returns the reference to // a new Socket object m_workerSocket[m_clientCount] = m_mainSocket.EndAccept (asyn); // Let the worker Socket do the further processing for the // just connected client WaitForData(m_workerSocket[m_clientCount]); // Now increment the client count ++m_clientCount; // Display this client connection as a status message on the GUI String str = String.Format("Client # {0} connected", m_clientCount); textBoxMsg.Text = str; // Since the main Socket is now free, it can go back and wait // for other clients who are attempting to connect m_mainSocket.BeginAccept(new AsyncCallback ( OnClientConnect ),null); } catch(ObjectDisposedException) { System.Diagnostics.Debugger.Log(0,"1","\n OnClientConnection: Socket has been closed\n"); } catch(SocketException se) { MessageBox.Show ( se.Message ); } }
The first thing we do inside the "OnClientConnect()" function is to call the EndAccept() method on the m_mainSocket member object, which will return a reference to another socket object. We set this object reference to one of the members of the array of Socket object references we have (m_workerSocket) and also increment the client counter. Now, because we have a reference to a new socket object that now can do the further transaction with the client, the main Socket (m_mainSocket) is free; hence, we will call its BeginAccept() method again to start waiting for connection requests from other clients.
On the worker socket, we use a similar strategy to receive the data from the client. In place of calling BeginAccept() and EndAccept(), here we call BeginReceive() and EndReceive(). This, in a nutshell, is the Socket Server implementation. While we are sending out data to the clients, the server simply uses the specific worker socket objects to send data to each client.
The Socket Client application is implemented in the SocketClient class (file name SocketClient.cs). Compared to the server where we have a main Socket and an array of worker Sockets, here we only have a single Socket object (m_clientSocket).
The two important methods in Socket class used by the Socket Client application are the Connect() and BeginReceive() method. Connect() is a synchronous method and is called to connect to a server that is listening for client connections. Because this call will succeed/fail immediately, depending on whether there is an active server listening or not at the specified IP and Port number, a synchronous method is okay for this purpose.
Once a connection is established, we call the BeginReceive() asynchronous function to wait for any socket write activity by the server. Here, if we call a synchronous method, the main thread on the client application will block and we will not be able to send any data to the server while the client is waiting for data from the server.
When there is any write activity on the socket from the server end, the internal thread started by BeginReceive() will invoke the callback function ("OnDataReceived()" in our case), which will take care of the further processing of the data written by the server.
When sending the data to the server, we just call the Send() method on the m_clientSocket object, which will synchronously write the data to the socket.
That is all there is for asynchronous socket communication using multiple clients.
Downloads