우선 이자료는 전에 ubuntu 설치하였는데, 버전이 변경되어 안되는 것이 많아서 다시 정리한다.

리눅스의 단점은 버전이 바뀔때마다 다시 찾아야하는 번거로움이 가끔은 즐겁지만, 급할때는 시간을 잡아먹는다..ㅠㅠ

이것 해결하느라 하루종일 다시 삽질을..

이것을 정리하는 것은 나중에 다시 보는 것도 있지만 저같이 삽질을 안했으면 하는 바램으로 적습니다.

우선 문제 발생부터 확인하고 적는다.

리눅스 설치 후 문제..

1. 그래픽 드라이브 문제 (http://redsea23.tistory.com/322) : 리눅스 부팅이 심히 걱정됨.

2. xrpd 설치 및 tab 키 설정: ssh 연결로 많이 작업하였는데.. 그래도 그래픽 화면으로 작업하고 싶은 1인... 연결 문제 및 키 문제(http://redsea23.tistory.com/321, http://redsea23.tistory.com/323)

3. Apache ServerName 문제: 도메인 네임 문제... httpd.conf 설정이 바뀌어 문제..ㅡㅡ;;

4. phpinfo(); 안보이는 문제

5. html 내에서 php 실행 문제

위의 문제가 발생하여 구글링으로 찾음..ㅡㅡ;;

저같은 삽질은 하지 맙시다.

-----------------------------

1번과 2번은 설치 관련이므로 관련 링크를 확인하세요.

APM 설치하기

(참고로 LAMP (Linux, Apache, MySQL, PHP)을 한번에 설치하는 방법이 있었음. 설치 전에 찾았으면 바로 했을 것을 설치한 후에 찾아서 못하였음..ㅠㅠ

참고 사이트: http://ubuntuhandbook.org/index.php/2013/10/install-lamp-ubuntu-13-10-server/ 

sudo apt-get install lamp-server^

완전 간단함..ㅠㅠ

)

1.  update & upgrade

우선 업그레이드와 업데이트 먼저

sudo apt-get update

sudo apt-get upgrade

2. Apache 설치

sudo apt-get install apache2

Apache 테스트 (http://localhost/ )

** 위 화면이 나오기는 하는데.. 경고나 에러 메시지가 보임.

Could not reliably determine the server’s fully qualified domain name, using 127.0.1.1 for ServerName 

이것은 서버 네임을 정해주라고 하는데..

쉽게 하려면 그냥 /etc/apache2/apache2.conf 에 ServerName만 넣어주면 된다.

하지만 apache2 conf 설정으로 하고 싶은 마음이 있어서 httpd.conf 를 만들어 연결할 것이다.

우선 /etc/apache2 디렉토리를 보면 다음과 같다.

위 폴더에서 보듯이 sites-available와 sites-enabled가 있다.

sites-available에 파일을 만들고 필요한 설정 파일을 sites-enabled에 링크를 시켜주면 설정이 완료된다.

우선 httpd.conf 부터 생성한다.

sudo nano /etc/apache2/sites-available/httpd.conf

그 후 다음과 같이 입력한 후 저장한다.

ServerName localhost

이제 파일을 심볼릭 링크로 sites-enabled로 연결한다.

sudo ln -s /etc/apache2/sites-available/httpd.conf /etc/apache2/sites-enabled/httpd.conf

그 후 apache server restart 한다.

sudo service apache2 restart

에러 메시지 없이 제대로 실행된다.


3. Install MySQL

MySQL을 설치한다.

sudo apt-get install mysql-server mysql-client 

root 패스워드를 넣으라고 창이 나오는데.. 패스워드 입력하면 됨.

MySQL 프로세스 확인

sudo service mysql status 

그럼 프로세스 넘버가 나옴


4. Install PHP

PHP을 설치한다.

sudo apt-get install php5 php5-mysql libapache2-mod-php5 

Test PHP 페이지를 작성한다.

sudo nano /var/www/testphp.php

아래와 같이 작성한 후 저장한다.

 <?
phpinfo();
?>

Apache 재시작한다.

sudo service apache2 restart 

그 후 웹페이지에서 확인한다.

http://localhost/testphp.php

하지만 아래와 같은 phpinfo 페이지가 보이지 않는다.


** phpinfo() 페이지가 보이지 않을때

php.ini 에서 short_open_tag = On으로 변경 및 AddType 추가한다.

sudo nano sudo nano /etc/php5/apache2/php.ini

에서 212 라인에서 아래와 같이 변경한다.
Off -> On

short_open_tag = On

그 후 apahce 재시작한다.

sudo service apache2 restart 

그 후 웹페이지에서 다시 확인한다.

http://localhost/testphp.php


그후 관련된 패키지 추가한다.

(중복된 것도 있으니.. 알아서 참고)

sudo apt-get install php5-mysql php5-curl php5-gd php5-intl php-pear php5-imagick php5-imap php5-mcrypt php5-memcache php5-ming php5-ps php5-pspell php5-recode php5-snmp php5-sqlite php5-tidy php5-xmlrpc php5-xsl

그 후 apahce 재시작한다.

sudo service apache2 restart 

추가로 xcache 설치(옵션: optimaizing PHP intermediate code)

sudo apt-get install php5-xcache

그 후 apahce 재시작한다.

sudo service apache2 restart 


5. phpMyAdmin 설치

phpMyAdmin 을 설치한다.

apt-get install phpmyadmin

이 후 질문은 다음과 같이 한다.

Web server to reconfigure automatically:

 <-- apache2

 Configure database for phpmyadmin with dbconfig-common?

 <-- No 

설치 완료 후 root로 접속하면 다음과 같은 페이지가 보일 것이다.


추가 사항

** Index 페이지 설정

sudo nano /etc/apache2/mods-available/dir.conf 

에서 추가하면 된다.

기본은 다음과 같다.

<IfModule mod_dir.c>

          DirectoryIndex index.php index.html index.cgi index.pl index.php index.xhtml index.htm

</IfModule> 


** Html 파일에 php 코드 실행 안될때

sudo nano /etc/apache2/mods-available/mime.conf 

에서 추가하면 된다.

AddType  application/x-httpd-php         .php .html . htm
AddType  application/x-httpd-php-source  .phps

그 후 아파치 재시작한다.


참고 사이트

1. http://ubuntuhandbook.org/index.php/2013/10/install-lamp-ubuntu-13-10-server/

2. http://gregrickaby.com/how-to-install-lamp-on-ubuntu/

3. http://www.unixmen.com/install-lamp-server-apache-mysql-php-ubuntu-13-10-server/

4. http://aslamnajeebdeen.com/blog/how-to-fix-apache-could-not-reliably-determine-the-servers-fully-qualified-domain-name-using-127011-for-servername-error-on-ubuntu

5. http://askubuntu.com/questions/56339/how-to-create-a-soft-or-symbolic-link

6. https://www.digitalocean.com/community/articles/how-to-install-linux-apache-mysql-php-lamp-stack-on-ubuntu


Posted by 노을지기

우분투에서 윈도우와 같은 장치 관리자가 있으면 좋겠다고 생각했는데.

역시나..있다.ㅋ

sudo apt-get install sysinfo
sudo apt-get install hardinfo

설치 후 setting 탭에 가면 있음.

Posted by 노을지기

xrdp로 작업시 tab 키 기능이 안된다.

그때 다음과 같은 명령어를 해주면 된다.

xfconf-query -c xfce4-keyboard-shortcuts -p /xfwm4/custom/'<'Super'>'Tab -r

 출처: http://blog.zerosum42.com/2011/10/tech-fixing-tab-key-in-vnc.html

Posted by 노을지기

출처: http://www.howopensource.com/2012/10/install-nvidia-geforce-driver-in-ubuntu-12-10-12-04-using-ppa/

그랙픽 카드가 제대로 설치가 안되어 오류가 장난이 아니였다.

재부팅하는것이 걱정될정도로..ㅠㅠ


구글에 검색하니 역시나..

감사합니다.

To add PPA for Ubuntu 13.10 / 13.04 / 12.10

Ubuntu 13.10 / 13.04 / 12.10 users, Run the following command in the terminal and type the password for the user when prompted.  Others use the Ubuntu-X PPA.

sudo apt-add-repository ppa:xorg-edgers/ppa

To add PPA for Ubuntu 12.04 / 11.10 / 11.04 / 10.04

sudo apt-add-repository ppa:ubuntu-x-swat/x-updates

To Update

sudo apt-get update

Now install the NVIDIA GeForce graphics driver 304.108 in your system, as you install other packages by using apt-get.

To Install

sudo apt-get install nvidia-current nvidia-settings

Above command will install the driver.


지원하는 그래픽

Supported Products

GeForce 600 series:

GTX 690, GTX 680, GTX 670, GTX 660 Ti, GTX 660, GTX 650, GT 645, GT 640, GT 630, GT 620, GT 610, 605

GeForce 600M series:

GTX 680M, GTX 675MX, GTX 675M, GTX 670MX, GTX 670M, GTX 660M, GT 650M, GT 645M, GT 640M LE, GT 640M, GT 635M, GT 630M, GT 620M, G610M

GeForce 500 series:

GTX 590, GTX 580, GTX 570, GTX 560 Ti, GTX 560 SE, GTX 560, GTX 555, GTX 550 Ti, GT 545, GT 530, GT 520, 510

GeForce 500M series:

GTX 580M, GTX 570M, GTX 560M, GT 555M, GT 550M, GT 540M, GT 525M, GT 520MX, GT 520M

GeForce 400 series:

GTX 480, GTX 470, GTX 465, GTX 460 v2, GTX 460 SE v2, GTX 460 SE, GTX 460, GTS 450, GT 440, GT 430, GT 420, GT 415, 405

GeForce 400M series:

GTX 485M, GTX 480M, GTX 470M, GTX 460M, GT 445M, GT 435M, GT 425M, GT 420M, GT 415M, 410M

GeForce 300 series:

GT 340, GT 330, GT 320, 315, 310

GeForce 300M series:

GTS 360M, GTS 350M, GT 335M, GT 330M, GT 325M, GT 320M, 320M, 315M, 310M, 305M

GeForce 200 series:

GTX 295, GTX 285, GTX 280, GTX 275, GTX 260, GTS 250, GTS 240, GT 240, GT 230, GT 220, G210, 210, 205

GeForce 200M series:

GTX 285M, GTX 280M, GTX 260M, GTS 260M, GTS 250M, GT 240M, GT 230M, GT 220M, G210M

GeForce 100 series:

GT 140, GT 130, GT 120, G 100

GeForce 100M series:

GTS 160M, GTS 150M, GT 130M, GT 120M, G 110M, G 105M, G 103M, G 102M

GeForce 9 series:

9800 GX2, 9800 GTX+, 9800 GTX/GTX+, 9800 GT, 9650 S, 9600 GT, 9600 GSO 512, 9600 GSO, 9600 GS, 9500 GT, 9500 GS, 9400 GT, 9400, 9300 SE, 9300 GS, 9300 GE, 9300 / nForce 730i, 9300, 9200, 9100

GeForce 9M series:

9800M GTX, 9800M GTS, 9800M GT, 9800M GS, 9700M GTS, 9700M GT, 9650M GT, 9650M GS, 9600M GT, 9600M GS, 9500M GS, 9500M G, 9400M G, 9400M, 9300M GS, 9300M G, 9200M GS, 9100M G

GeForce 8 series:

8800 Ultra, 8800 GTX, 8800 GTS 512, 8800 GTS, 8800 GT, 8800 GS, 8600 GTS, 8600 GS, 8500 GT, 8400 SE, 8400 GS, 8400, 8300 GS, 8300, 8200, 8100 / nForce 720a

GeForce 8M series:

8800M GTX, 8800M GTS, 8700M GT, 8600M GT, 8600M GS, 8400M GT, 8400M GS, 8400M G, 8200M G

GeForce 7 series:

7950 GX2, 7950 GT, 7900 GTX, 7900 GT/GTO, 7900 GS, 7800 SLI, 7800 GTX, 7800 GT, 7800 GS, 7650 GS, 7600 LE, 7600 GT, 7600 GS, 7500 LE, 7350 LE, 7300 SE / 7200 GS, 7300 LE, 7300 GT, 7300 GS, 7150M /NVIDIA nForce 630M, 7150 / NVIDIA nForce 630i, 7100 GS, 7100 / NVIDIA nForce 630i, 7050 PV / NVIDIA nForce 630a, 7050 / NVIDIA nForce 630i, 7050 / nForce 620i, 7025 / NVIDIA nForce 630a, 7000M /NVIDIA nForce 610M

GeForce Go 7 series:

Go 7950 GTX, Go 7900 GS, Go 7800 GTX, Go 7800, Go 7700, Go 7600 GT, Go 7600, Go 7400, Go 7300, Go 7200

GeForce 6 series:

6800 XT, 6800 XE, 6800 Ultra, 6800 LE, 6800 GT, 6800 GS, 6800, 6700 XL, 6610 XL, 6600 VE, 6600 LE, 6600 GT, 6600, 6500, 6250, 6200 TurboCache, 6200SE TurboCache, 6200 LE, 6200 A-LE, 6200, 6150SE nForce 430, 6150 LE, 6150, 6100 nForce 420, 6100 nForce 405, 6100 nForce 400, 6100

NVS Series:

NVS 510, NVS 310, NVS 300

Quadro series:

K5000, 7000, 6000, 600, 5000, 410, 4000, 400, 2000D, 2000

Quadro FX series:

FX Go1400, FX 5800, FX 580, FX 570, FX 5600, FX 560, FX 5500, FX 550, FX 540, FX 4800, FX 4700 X2, FX 4600, FX 4500 X2, FX 4500, FX 4000, FX 380 LP, FX 3800, FX 380, FX 370 Low Profile, FX 3700, FX 370, FX 3500, FX 350, FX 3450/4000 SDI, FX 3400/4400, FX 1800, FX 1700, FX 1500, FX 1400, CX

Quadro Notebook series:

K5000M, K4000M, K3000M, K2000M, K1000M, 5010M, 5000M, 4000M, 3000M, 2000M, 1000M

Quadro FX Notebook series:

FX 880M, FX 770M, FX 570M, FX 560M, FX 540M, FX 380M, FX 3800M, FX 370M, FX 3700M, FX 360M, FX 3600M, FX 350M, FX 2800M, FX 2700M, FX 2500M, FX 1800M, FX 1700M, FX 1600M, FX 1500M

Quadro NVS series:

NVS 450, NVS 440, NVS 420, NVS 295, NVS 290, NVS 285, NVS 210S / 6150LE

Quadro NVS Notebook series:

NVS 5400M, NVS 5200M, NVS 510M, NVS 4200M, NVS 320M, NVS 160M, NVS 150M, NVS 140M, NVS 135M, NVS 130M, NVS 120M, NVS 110M

Quadro Plex series:

Model IV, Model II, D Series, 7000

Quadro G-Sync series:

G-Sync II

Quadro SDI series:

Quadro SDI

ION series:

ION LE, ION

C-Class Processors:

Tesla C870, Tesla C2075, Tesla C2070, Tesla C2050, Tesla C1060, T10 Processor

M-Class Processors:

Tesla M2090, Tesla M2075, Tesla M2070-Q, Tesla M2070, Tesla M2050, Tesla M1060

X-Class Processors:

Tesla X2090

K-Series Processors:

Tesla K10

Posted by 노을지기

출처: http://c-nergy.be/blog/?p=4448

Ubuntu 12 버전일때는 설정 변경으로 가능하였는데, 13 부터는 아예 다른 software을 사용해야하는 어려움이 있다.

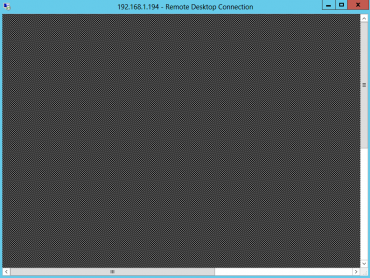
xrdp_0

위와 같은 화면이 나왔을 경우 그 답답함..ㅠㅠ

구글에서 검색한 결과 역시.. 똑똑한 분이 촉촉한 답을 주셨다.. 감사하옵니다.^^;;


Installing xrdp package

우선 xrdp package을 설치한다.

  • sudo apt-get install xrdp

Installing xfce package

xfce package을 설치한다.

  • sudo add-apt-repository ppa:xubuntu-dev/xfce-4.10
  • sudo apt-get update
  • sudo apt-get install xfce4

Configure your session to use xfce

xsession의 설정 변경한다.

echo xfce4-session >~/.xsession  

그리고 xrdp 재시작한다.

sudo service xrdp restart

Configure your keyboard layout in the xrdp login page 

만일 us english을 사용하지 않으면 키보드 레이아웃을 변경하라고 하는데...
전 us 만 사용하니.. 스킵.

Step 1 : You go to the /etc/xrdp directory (cd /etc/xrdp)

Step 2 : you issue the command setxkbmap -layout <%your layout%>  to define which keyboard map/layout to use (in my case, setxkbmap be for belgium layout)

Step 3 : create a copy of the km-4090.ini file into the same directory.  It seems that this is the default file used by xrdp to define the keyboard layout. You will need to use sudo in order to be able to write into the directory

Step 4 :  Check that you have a backup of your file by typing the dir or ls command

Step 5 : update the file  by issuing the following command sudo xrdp-genkeymap km-080c.ini (where km-080c.ini is the file needed for Belgian keyboard)


그 후 접속 하면 완료..

이분께 정말 감사하다..^^


Posted by 노을지기